First camera tests and sketches: Week Sept. 26
- Nicholas Vidal
- Oct 10, 2024
- 2 min read
Updated: Dec 17, 2024
The first working week of this thesis project started strong with a reworked and focused pitch. Previously my idea was a little too open-ended focusing mainly on just upcycling old cameras to make them easily usable again. After reworking the idea it became about only one camera kit that is designed to be easily buildable/reproducible and will provide people with the means to experiment with a usually expensive medium.
Pitch:
Medium and large-format photography are expensive hobbies that most people will never get to experiment with because of these boundaries. Through product, package, and editorial design I will create a product that allows people to experiment with these types of photography without the expensive equipment. This device will democratize large-format photography and bring it to a wider audience. Along with this the project will help teach people the basics of photography through building and experimentation.
Meeting With Steven Greenstein

While reworking the pitch I met with a mathematics professor on campus named Steven Greenstein who has experience with 3d printing along with a brother who is a photographer. This conversation and brainstorming session helped reel in the more ambitious portion of the project. Using geometry he helped me see a much more efficient way of covering the whole image circle with a much smaller digital sensor. The sketches below show this rotating adapter idea where we have the a digital camera moving on an axis while also having the whole device spinning freely.
Printing Tests

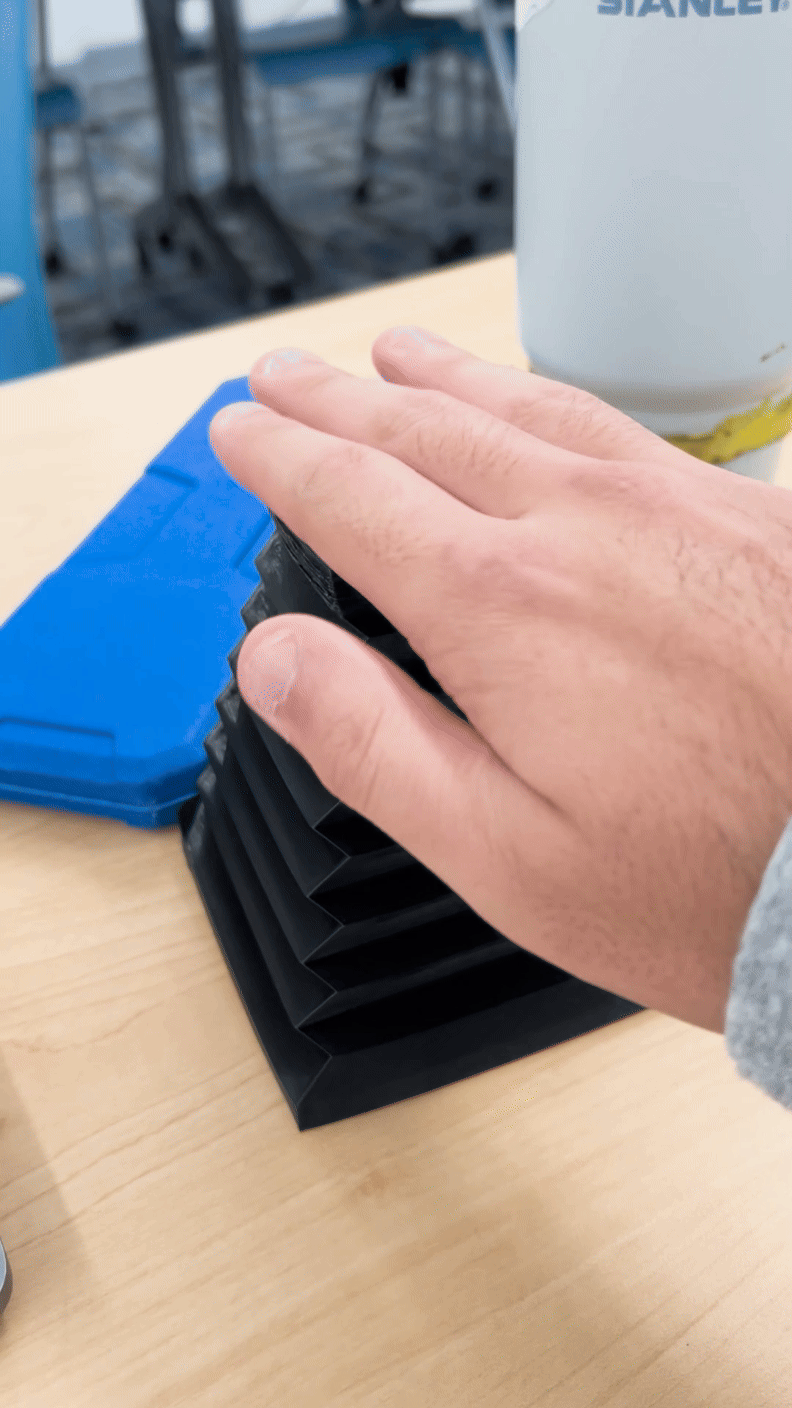
Starting the design of the camera I began focusing on the bellows of the camera. The bellows are one of the harder things to create because it is a skill to create bellows. From my research into classic bellows making it is an art that really isn't mastered on the first try. Zebra dry plates outline it here in thier tutorial on making bellows the traditional way by gluing thick paper cutouts into the fabric that is then folded into the appropriate shape. To make the camera more easily producible and have a bit more freedom with my experimentation I researched 3d printing bellows with a flexible plastic called TPU. This is sadly a very under-explored method and I could really only find a few examples of this online. Thankfully the only source for this that I could find also just so happened to have released a tool for creating the files. This video by the Kiwi Tinkerer showcases his 3d printed bellows along with linking to his other videos showing his tools to make them. So after using his tool to create this prototype print, I was happy to get a wonderful flexible bellows replacement. The big difference between normal bellows and these TPU ones is that the entire thing is flexible not just the creases. Using this bellows tool would help me avoid lots of problems and to use the for the final project I only had to provide attribution to the Kiwi Tinkerer.
Going Forward
For next week I'm going to start working on the camera itself. Hopefully, I will get a working prototype for next week but there are always unknown problems that come when making these sorts of things. This first version will be very quick and dirty focusing mainly on getting a working prototype.


Comments